paperboy

Paperboy
A middleware written in TypeScript to connect different CMS with your delivery layer and to notify it of content changes.
Overview
To leverage the flexibility of a content management system while having the performance of a static site one needs to decouple the delivery layer from the CMS. Paperboy acts as a broker between these two layers by informing the delivery layer of content changes. To support the use-case of multiple frontend servers Paperboy multiplexes events via a Queue. Using the Magnolia CMS, the complete setup looks like the following:
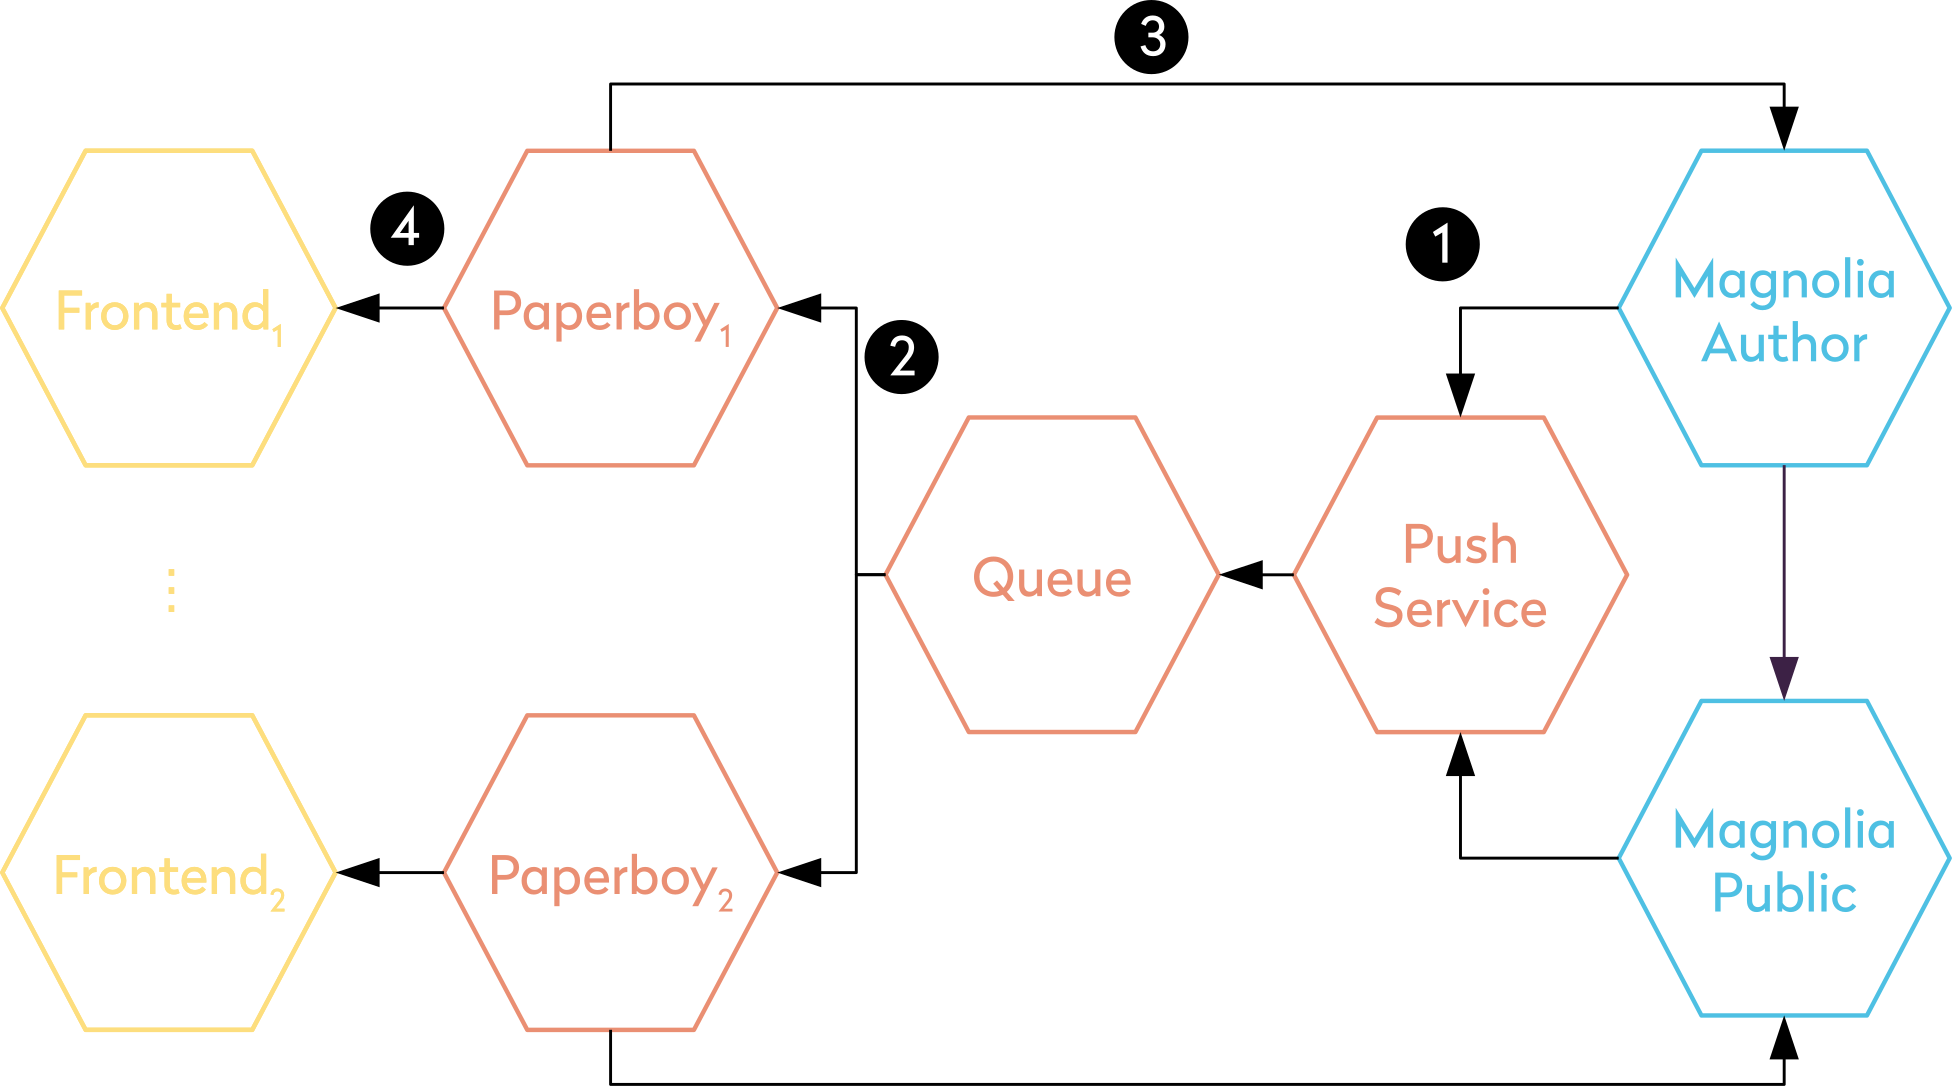
- This setup works by add a Magnolia module to both instances, which listens for content changes and publishes details of those changes to a Webhook which publishes a message to a RabbitMQ or NATS server
- A client-side library then subscribes to this queue
- Finally it will execute an arbitrary command to trigger the actual rebuild of the frontend
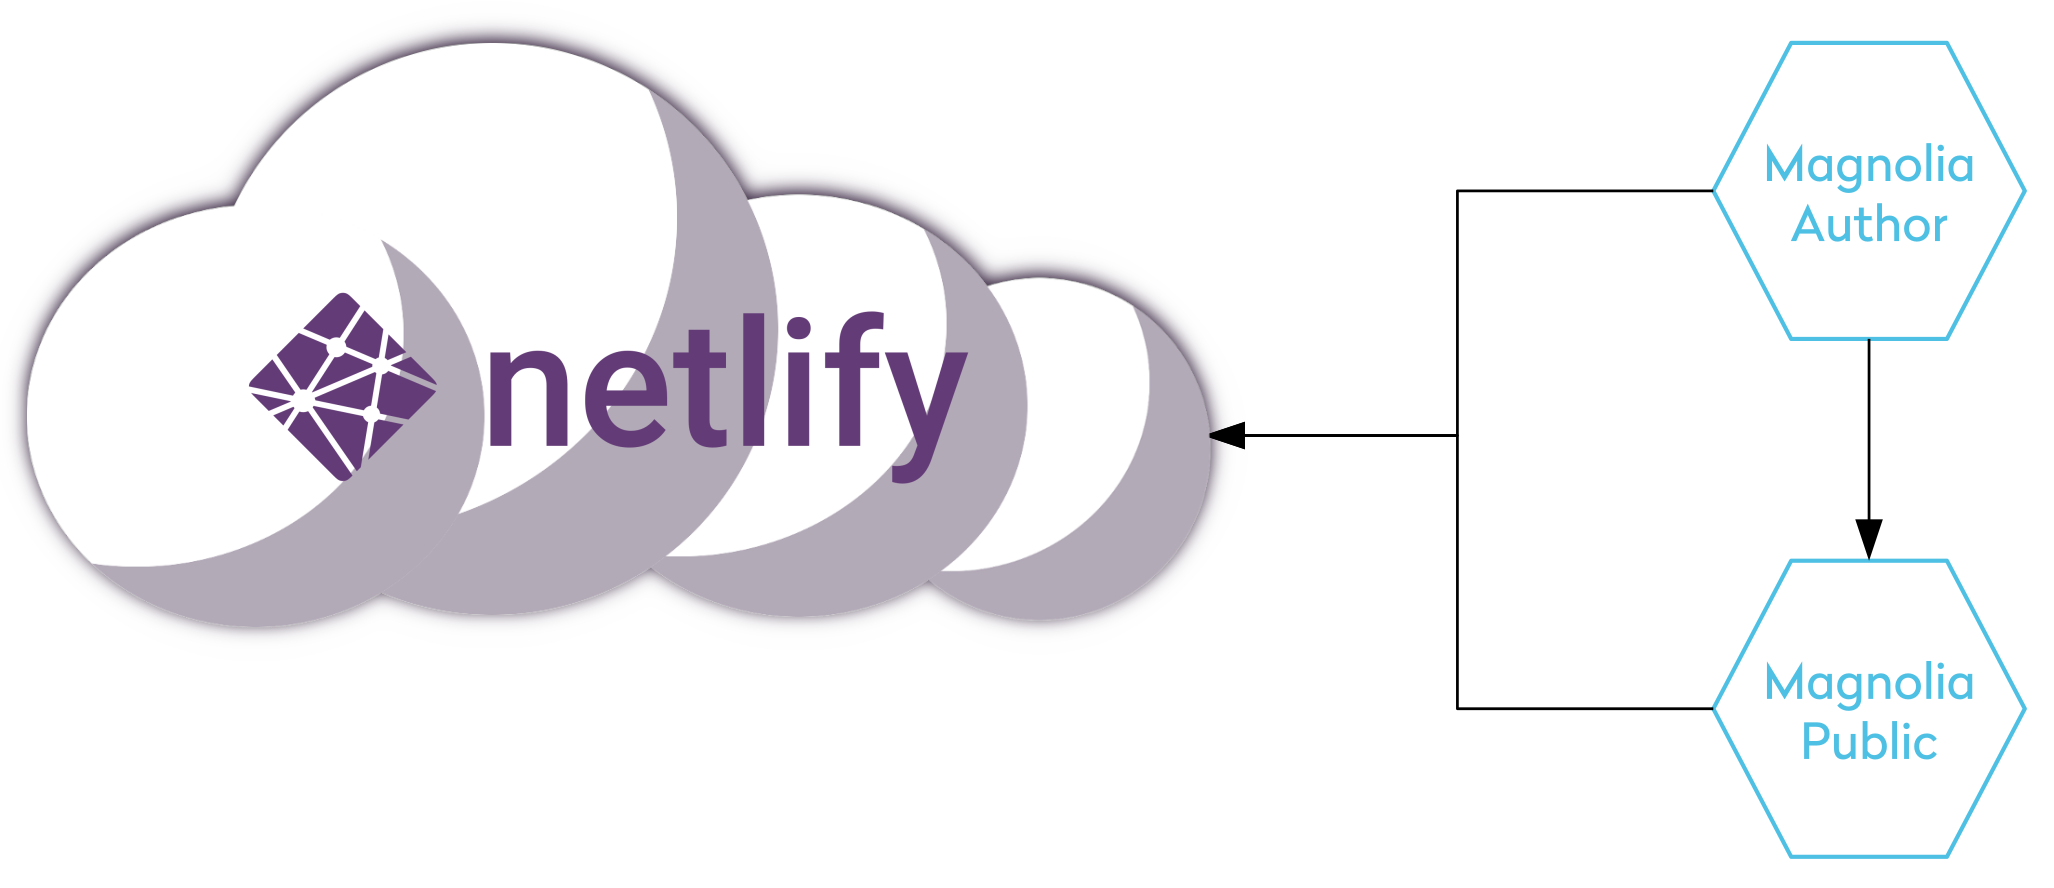
In case we don’t want to operate the delivery tier ourselves and instead use a CDN like Netlify you can use the Magnolia Module to publish directly to a webhook by the CDN provider:
Components
For the content management tier we provide two submodules which together with a queue handle the propagation of content change events:
- Paperboy push service: A small HTTP service that can be used as a webhook.
- Paperboy Magnolia module: A module that integrates directly into Magnolia and sends HTTP messages to the push service (or an arbitrary webhook) whenever a change in a watched workspace occurs.
The subscriber part of this system is currently comprised of three submodules in this repository:
- Paperboy Core: The core library which handles all generic configuration and knows how to execute the commands to trigger rebuilds.
- Paperboy CLI: A simple CLI to ease usage and setup
Demo
Run the following command to start a queue, push service and a simple ‘frontend’:
$ docker-compose -f docker-compose.nats.yml up
When all three services are up an running execute the follow command to send a message via the push service:
$ curl -X POST \
  http://localhost:8080/ \
  -H 'Authorization: Bearer supersecret' \
  -H 'Content-Type: application/x-www-form-urlencoded' \
  -d 'payload=%7B%22foo%22%3A%22bar%22%7D&source=foo'
Quickstart
Install Yeoman and our generator:
$ npm install -g yo generator-paperboy
Afterwards just start a wizard via:
$ yo paperboy
Manual installation
To get started with your project, execute the stepts in Frontend Set-Up and Magnolia Set-Up. Afterwards either execute the steps from Custom delivery layer or Netlify depending on your setup.
Frontend Set-Up
To use Paperboy in your Frontend you can simply install the CLI globally via:
$ npm i -g @neoskop/paperboy-cli
In case that you are writing the frontend with JavaScript you can also install the CLI locally in your project:
$ npm i --save-dev @neoskop/paperboy-cli
Magnolia Set-Up
Generate a blank Magnolia project using Magnolia’s archetype catalog:
$ mvn org.apache.maven.plugins:maven-archetype-plugin:2.4:generate -DarchetypeCatalog=https://nexus.magnolia-cms.com/content/groups/public/  \
-Dfilter=info.magnolia.maven.archetypes:magnolia-project-archetype
Afterwards add the Paperboy Magnolia Module to the webapp’s POM.xml:
<dependency>
 <groupId>de.neoskop.magnolia</groupId>
 <artifactId>paperboy</artifactId>
 <version>2.0.0</version>
</dependency>
Build the WAR and deploy it in a servlet container.
Custom delivery layer
In case of a custom deliver layer, start the push service and a NATS server by running the following command in the root folder of this repository:
$ docker-compose -f docker-compose.nats.yml up
(Substitute docker-compose.nats.yml with docker-compose.rabbitmq.yml to use an RabbitMQ server)
When the containers are up and running, import the following config into Magnolia’s configuration under /modules/paperboy/config:
webhookConfig:
  authorization: BEARER_TOKEN
  bearerToken: supersecret
  url: http://push-service:8080/
To configure the frontend, create a file called paperboy.config.json with the following contents:
{
  "queue": {
    "uri": "nats://queue:4222"
  },
  "command": "npm start"
}
Finally change to the frontend directory and run:
$ paperboy start
Netlify
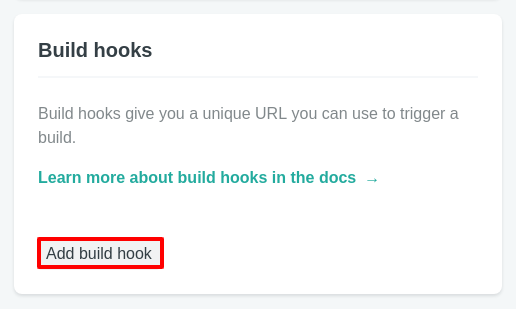
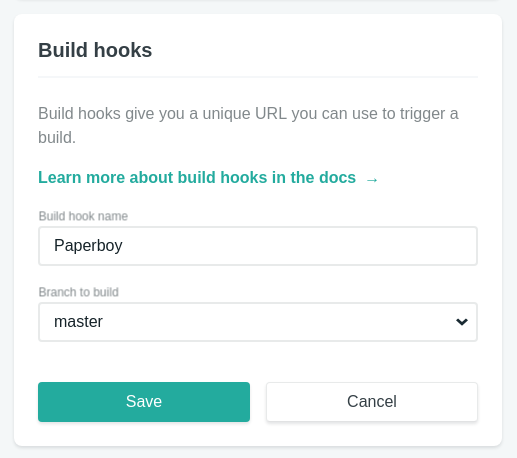
To trigger a rebuild of the frontend whenever a change in Magnolia’s content occurs, create a webhook in Netlify under Settings > Build & Deploy in your project.
Click “Add build hook”:
Give the hook a meaningful name and press “Save”:
Copy the webhook’s URL:
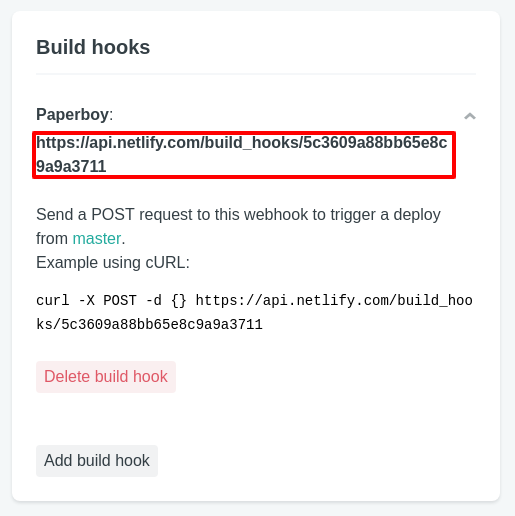
Finally import the following config into Magnolia’s configuration under /modules/paperboy/config:
webhookConfig:
  authorization: NONE
  url: https://api.netlify.com/build_hooks/<webhook-id>
License
This project is under the terms of the Apache License, Version 2.0. A copy of this license is included with the sources.